Note: Written before update 1.1.0 when the direction of the sunrise/set was fixed. North here is now west.
I feel a little bad starting a completely new build when I’m still technically not finished with Bad Joke Prison (I’ll explain it when I post about it), or a lot of the last little fiddly details of Wilshire castle or Sand Baori, though they look awesome as is and I shouldn’t stress about it. I mean when you really get down to it there some detail work I haven’t finished on the Crystal Palace. and that was months ago. I’m really excited about this build though, and after my nerdrage of last week, plus some real life Stuff Happening, things to get excited about = win.
I’d considered teasing what it’s going to be, but I’m terrible with that sort of thing, so in case you couldn’t figure it out from the title:
Grand Central Terminal, New York, NYThis is a multi-layered challenge for me. One, this is the first time I’m building something based on a place I’ve actually been, as opposed to seeing a picture of somewhere and thinking “ooh, that looks cool” and building something with a LOT of imagination and creative license filling the gaps. Not only that, this is one of my favorite places on earth. To a native New Yorker who is also mad for all things having to do with railed transport, Grand Central is like… you know what, there aren’t even words. I guess the closest I would come up with is a devout Catholic getting to visit the Vatican. So there’s an emotional component in this build. This isn’t to say there won’t be creative license taken with it – it’s not going to be a dead accurate model by a long shot – but I hope to capture the feel, the grandness, if you will, of this train station by the time I’m done.
But before I get into how I’m doing with that so far, a common question from people visiting my open runs is “how the heck did you build this subway and how long did it take you?” I usually answer something along the lines of “in sections, and for-freaking-ever,” but since I had to expand the tract from its former northern terminus at Wilshire Castle on up to the GCT site, I figured I’d try documenting the process a little.
I will note that building said subway expansion is a crapton easier now that Plug gives me coordinates. Now that I know the extant subway runs at (x, 42, -3), all I have to do is line up x.
Lets say Point A is where the existing subway ends and point B is where the new station/end/next build will be. The first thing I do is dig a 1×2 tunnel all the way end to end.
what the initial tunnel looks like from point B.Honestly this part can be the most tedious, especially when either a) you don’t know where precisely you’re going because you don’t have access to coords and are therefore counting off every time you move forward a square or b) you DO know where you’re going and you’re all like “what, I’ve only gone 100 blocks? and I have 500 more to go?”
also bad if 2 block high spaces trigger claustrophobia.Then once you have your teeny Steve-sized tunnel you get to go back through it, laying down TNT in intervals. You can also just keep digging it out by hand/tool. Either way this process involves running back and forth through your tunnel a LOT.)
Pro-tip: do not place TNT on cobble fences.Tedious as it is the fun part is if you do this correctly, you light the TNT at one end and then it just keeps going off in thin this lovely chain of explodey all the way to the other end. It’s kind of hilarious because it only goes so far as the couple of chunks you can see, and then you walk forward a few minutes later and OH NO MORE SPLODE. It’s pretty glorious.
But then the funs over and you have detritus to clean up. Ugh.
we’re gonna need a few more pickaxes.If you’re in creative mode, this is where “bulldozing” comes in handy, especially if a) you’re flying b) you have blocks above you to clear. Get your face level with the line of blocks you want to clean out, then tap and hold. You’ll dig out the six blocks in front of you and then stop. Keep holding, but hit the forward arrow at the same time. Watch the blocks in front zip apart as fast as you can fly at them. Makes things a lot less tedious. It does also work with blocks directly in front of you on the ground, but you do run the risk of jumping if you don’t time it right. Still – practice! Anything that makes clearing a large number of block faster = win.
It’s getting better…I dig out a five block high by five across square for my subway, and then line it with cobblestone on the top and sides. The bottom gets gravel in a 3×2 U formation, with the track running in the groove in the middle. But before I start slinging cobble around I end up with these cavernous long square holes that call to mind the giant water tunnels running waaaaaaaaaaaaaaaaaaaaaaay below Manhattan. Go look em up sometime.
Clear tunnel. a long cuboid to nowhere.Well now I have a tunnel, now what? Dig out a line of holes on either side? Why would I do that?
Wait no actually I AM doing that.No real practical reason besides aesthetics. I put netherrack in those spots so that the tunnel walls have a little color. It makes more sense in the next shot.
From the former terminus.And here.
beginning of tunnel liningAlso about every 64 blocks or so, there’s a shaft with a ladder up to the surface.
hey there is sky up there!I used to need to dig these up so I could figure out where the hell I was. Also it proved handy sometimes to have a periodic access point to the train tunnel below from the surface. Slightly less handy from the tunnels, but still possible if you have a couple of blocks and a couple of extension ladders with you.
an end section waiting…Most of the rest of the tunnel construction is just more running back and forth laying down cobblestone, gravel, rail, alternating patterns of torches and netherrack, and it’s all very tedious grunt work at this point.
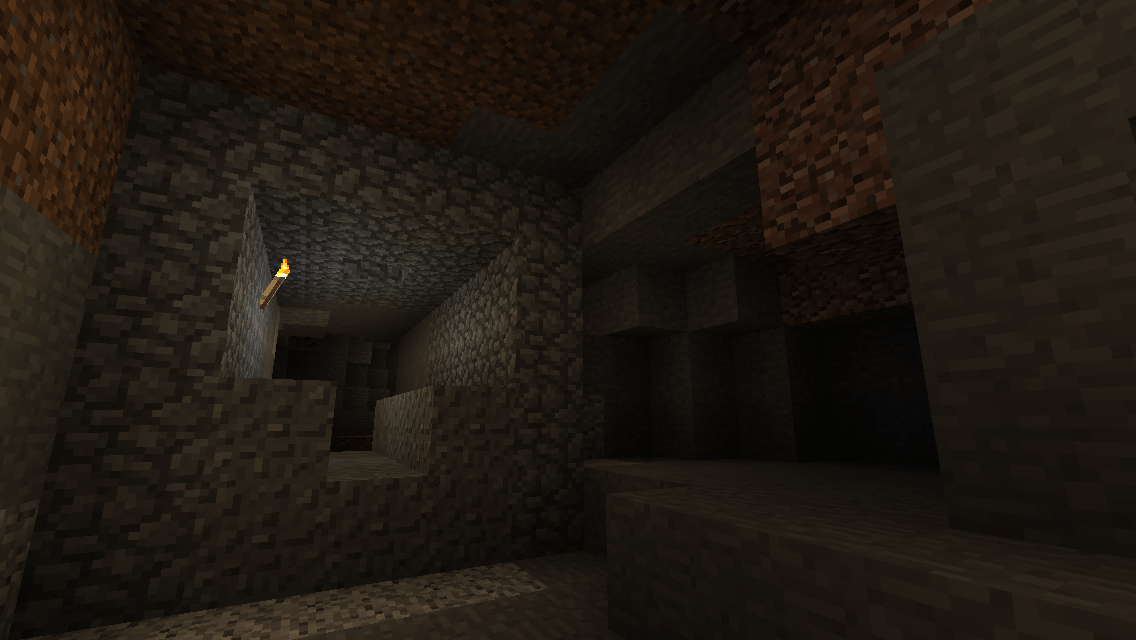
Almost done, just gotta do the ceiling.one thing that does liven things up is that digging out subway tunnels you will inevitably cross paths with a wandering cave or three. I don’t seal these intersections usually, it’s more fun to leave access to caves open for later exploration. If the cave is mostly above the tunnel, I glass in the ceiling instead of using cobblestone so you can see up as you pass. Occasionally this leads to random discoveries, like hey, I’ve never been in this cave before why is that wall randomly cobblestone?
There is nothing suspicious about this wall, nor about the moaning behind it. Murrrrr. Growl. Gurrrrr. Totally a dungeon.We’ll have to come back and investigate that at some point.
Meanwhile above ground…
Outline in gravelThis pretty much looks like a glorified crop circle (crop square?) but it’s actually me translating a graph paper outline to the actual terrain. (Terribly; I had to lay down that gravel three times before I got it right. D:)
And then you pull out the explosive stuff.clearing out that sizable of a space requires quite a bit of both controlled detonation and “lets pack a 7×7 space full of TNT and see what happens” sort of detonation.
still clearing out the rock.And occasionally putting up single walls.
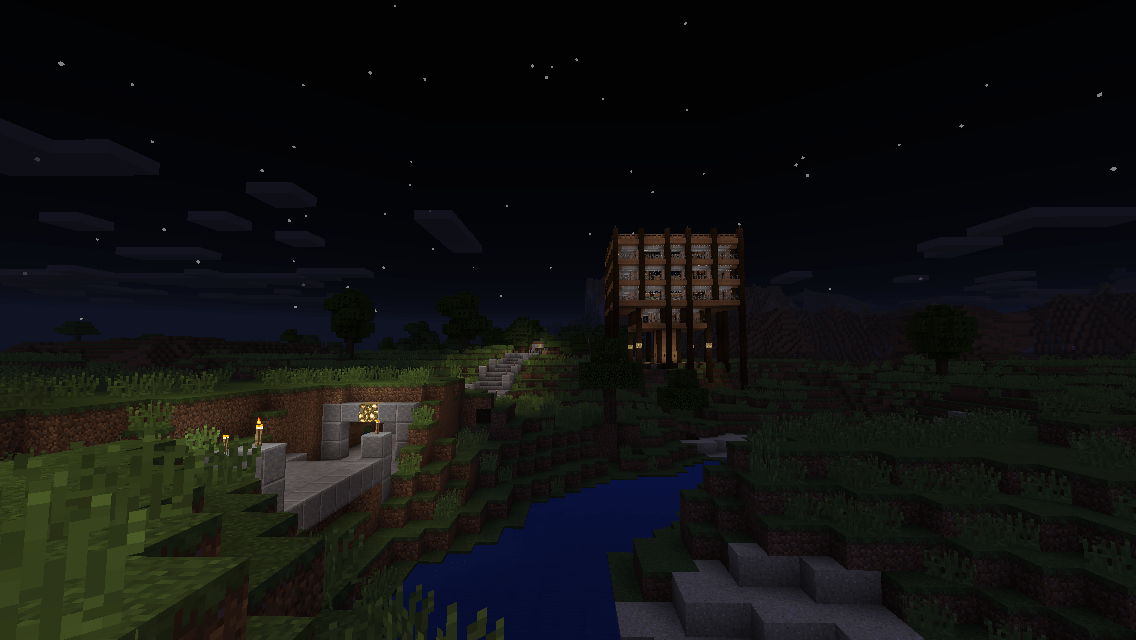
One wall up to the surface and 3 bellmouths of subways future.So there are going to be 12 tracks feeding into here altogether. I highly doubt I’ll build out ALL of them, but I’ve always been more ambitious than practical.
Clear crater. Or hole? Or something. Looking at the cleared space from above.The obsidian is just for me to keep track of where the middle is.
More bellmouths for additional lines.Thinking since the primary subway line had Netherrack embedded in the wall I may change that up for the other ones. I think I want some sort of green block for the line that will eventually go east/west. Or hell, I always end up with more lapis than I ever know what to do with, maybe I’ll just make it the blue line. We’ll see.
Finished the floor, bellmouths and track stubs.Makes an interesting light pattern.
Floor notches, for later Finished bellmouths with walls.I’m pretty happy with how the wall patterning came out here.
That’s all I’ve done so far, but it’s going really well and I remain really psyched about this. There will be more work in progress updates to come… can’t wait to get the mezzanine done so I can get cracking on the grand hall.
Note: Written before update 1.1.0 when the direction of the sunrise/set was fixed. North here is now west.
One of my MCPE builds on Fisher Price® My First Creative World™ was a giant zombie. It was a challenge figuring out what color blocks to use, and working around the fact that unlike skins, blocks have the same texture on all four sides. But the statue got built with the necessary fudging of detail and it lurked on one side of several incarnations of my scavenger hunt world, at least until in some of them, Wee Beastie TNT’ed them to the ground. ‘Cause, you know, Giant Zombie.
Fast forward to my infinite world, and a pretty patch of shoreline and a small island out from the mainland, and I thought, what the heck, I’ll rebuild the Giant Zombie. And then I thought, nah. I’ll build FOUR of them. Get all Lord of the Ringsy. So I squared off and expanded the island and built these four colossal gentlemen quietly menacing onlookers in each direction. Though it’s really hard to menace anything with hordes of chickens sprouting out of your feet.
Yes, they are connected.A door inside!Its a long way up…Shoulder level!balconies and doors connect the four.A view out of an arm.Interior of Head #1Interior of Head #2Interior of Head #3Interior of Head #4There were stairs going down too.A vast white room…Wait, more down?down down downFour Guardians subway station
This was actually the first subway station I built on the north/south line. (When I add more, it’s gonna be called the Netherrack line.) It’s a little smaller than subsequent stations, since I was still figuring things out, and the only one with stairs on the platform instead of in a space behind the wall. The rest of the stations got more standardized over time, but this one gets to be quirky because it was first.
Not pictured – I should have gotten a picture of the island from the sky during a creative run, because the water around these guys? FILLED with chickens. There is a circle of flapping white specks around the island. Yes, there’s a spawner somewhere. Occasionally they get down into the subway and hop a minecart. Chickens in minecarts are way funnier than they ought to be.
And thusly ends the tale of the four.
UPDATE (6/28/15): About that aforementioned picture:
So. Many. Chickens.
Also these guys have since acquired names. They are Icky, Stinky, Yucky and Clyde. Don’t ask me which one’s which.
Most of this weekend’s build work included laying a ~1115 block segment of road running from a brick house* I’d mostly finished a few weeks ago (just had to add the roof) to the mostly unexplored northwestern shoreline. This was slightly more of a pain in the neck than usual (literally at some points throughout Sunday even) because after last Monday’s server session I’d left my game set on survival for Reasons.** After having my game mostly creative for the past little while, I’d kinda forgotten how arduous building a Large Thing in Survival mode is, even if you’re using Plug to cheat a little with regard to tools and inventory. Arduous, but somehow satisfying.
Anyway, I did finish the road (and the house, which I’m calling Rose House, not Brick… hoooooooooouse***), and since Survival mode did slow me up a little it meant I had time to stop and appreciate the scenery along the way.
Rose House from the road.
I was experimenting with a different roof shape on this house. Very unsure if like.
Back of Rose House
We’re getting ready for boats, hence the dock in the back. Also if you look carefully through the water you can see the double basement.
Off in the distance…
I really love having my view distance hacked to 255 blocks. it doesn’t seem to slow up my gameplay much, aside from an uptick in chunk errors. Still, a view like that… worth it.
Tiptoe… through the tulips… with me…Another stunning view!Sunset over the cliffs
I have a horrific compulsion to take pictures at sunset. Minecraft sunsets are just so PRETTY now.
Shore Cave
I decided it would be really cool to have the road end emerging through this cave. I wanted to take a before picture first through.
Also can I just say I love that Plug gives you access to coordinates? It makes road planning way easier.
All roads have an end.
But this road ends emerging triumphantly through a cave!
Night and day
The other thing I like to do is if I found something super pretty, I like to stand in one spot and take a lot of pictures. This is the first time I’ve spliced those time-lapsed screenshots into one picture though, and I like how it came out. Might print and frame it even.
So yeah, now we have come… to the ENNNNNND OF THE ROOOOOOOOAD.****
behold, a Boyz II Men song.
Meanwhile in B plot land, 576875 showed up for a bit on Sunday afternoon to work on the farm they’re building across from Spawn House so players don’t have to go ranging far and wide for food. It’s coming along nicely. As of last night it did not have a roof, 5 put that in tonight.
576875’s farmCrops and lights
By the way, holy cats, it’s actually really hard and frustrating trying to lead livestock into a confined area. I’d only done it with sheep before, and they’re dumb enough to follow you relentlessly anywhere so long as you’re holding wheat. Cows, pigs and chickens aren’t nearly so cooperative.
Moooooooooooo
They will however get RIGHT up in your grill though.
While fishing the above pictured cow out of the river and trying to lead it back to the farm, I stumbled across a house built by mathguy04 a few sessions back.
mathguy04’s house.
One of the reasons I’m really enjoying having guest players is that they bring some fresh ideas and building styles into my world. For example 5’s farm system of placing down a square of water for the crops, placing a slab one block over it, and then having a floating glowstone block above that as a crop light. I also really liked how mathguy framed the giant bay window of his house entirely with doubled slabs, which gives it a neat look. So yeah, live and learn. Reminds me, his house is missing a bed, I may go back and leave one and a houseplant for him as a housewarming present.
Hopefully I’ll have more news from the open server front soon. I’m open all week but haven’t been advertising it much. Hopefully I’ll get a few more folks in later in the week or over the weekend. Also I’m so behind on the build posts front. I’ll tackle that project this week I think.
* she’s mighty mighty… letting it all hang out ayyyy she’s a brick… HOOOOOOOOOUUUUSE… sorry, couldn’t help myself.
** Reasons being I wanted to hack in iron doors for the prison build, which is coming along. Hopefully done this week.
All right, Crazy Busy-making Stuff is over with for a moment, so time to catch up on posts about my MCPE builds!
I finished the circus a hair too late for the Reddit WBC it was created for, but it still came out cool and I’m pretty happy with it. It gave me something to do with the dead flat mountain space on the main subway line between the Crystal Palace and the Castle. I’d briefly considered starting a giant train station build there but I think that’s ultimately going to go north of the castle.
Anyway. Pictures!
What? A circus? Awesome, lets go.Up through the mountains!
Carving stairways and roads through mountains is kind of a pain, but at least the views are nice from up here?
I see the Big Top!Tickets, Please!
It’s always a little tricky designing spaces for villagers to stand in (lunch counters, ticket booths, any sort of service type place) and not have them wander off. you end up getting rather good at overhangs.
Ticket obtained! Lets go in!That’s one way to make a tightrope. Or should I say tightfence?2 out of 3 rings visible.See Mr. Hmm’s performing dogs! In ring #3 – Hmmph’s Wild exotic mooshrooms!Farmer Hmp’s Rainbow Sheep! Here for one day only!…is that a sheep on the tightrope!?The Purple Sheep of Pachysandra Island!
Which of course means I now have to create a Pachysandra Island somewhere and fill it with purple sheep…
Would you like to buy a flower?
I apparently have a thing for flower shops. Be nice when you can actially buy things with emeralds…
HMM. one hot dog please!No idea what’s going on here, but maybe we should move along.Popcorn, getcher fresh popcorn!Wait – a Freak Show? Ooo.Quick, the ticket guy isn’t looking… *sneaka sneaka*
Don’t do this in real life, kids.
Behold, the terrifying and explosive Creepers!Observe the horror inducing Skeletons and Zombies!Tremble at the sight of the Zombie Pigmen! Straight from The Nether!Marvel at the Mildly Annoying Silverfish!
And that’s the end of it. I might put more tents in at some point and there was a cave system underneath that I hadn’t had a chance to map out yet, and the grounds are overrun with loose sheep with colors not found in nature and chickens.
World: Main Location: -745 78 -34 Creation Mode: Creative Build completed: post date
I mentioned I liked browsing Brutalism tumblrs and other images for inspiration for Minecraft builds. One day I happened across a pictures of the Blue Cross Blue Shield building in Chicago, IL.
Apparently Hertz has been around a while.
The building still stands, although it’s been given a bit of a facelift and the more generic moniker of “55 West Wacker.” (It nevertheless has made several “Chicago’s ugliest buildings” lists, which seems a little unfair – I’ve seen way uglier examples of Brutalism.) It also now has very tall neighbors on all sides but the front, rendering all those pretty windows useless and making the building itself look a little squat by comparison. Nevertheless something about this building held my attention. Maybe it was all those pretty windows.
Oh hey look, I figured out how to make WordPress galleries work, go me.
View from the road.
Sunset
Every floor has different colored carpet, or a different (often purposefully hideous) checked pattern
Side corner view, showing the pools.
Door to the lobby.
Lobby
Third floor. The rest of them are pretty identical.
Looking down the stairs.
The one bed at this build.
The Basement!
There was a natural cave here when I started building the tower. It was mostly walled off by the pools but I carved out this stairwell down to it so I could continue to mine for materials.
View of the southwest roads.
The southeast roads. You can see the sheep farm I built to supply all the carpet. Also 3 houses.
Another view of the sheep farm.
Looking off across the swamp to Baori.
The road north, looping back on itself.
Another look at Baori from the top level (which isn’t the roof!)
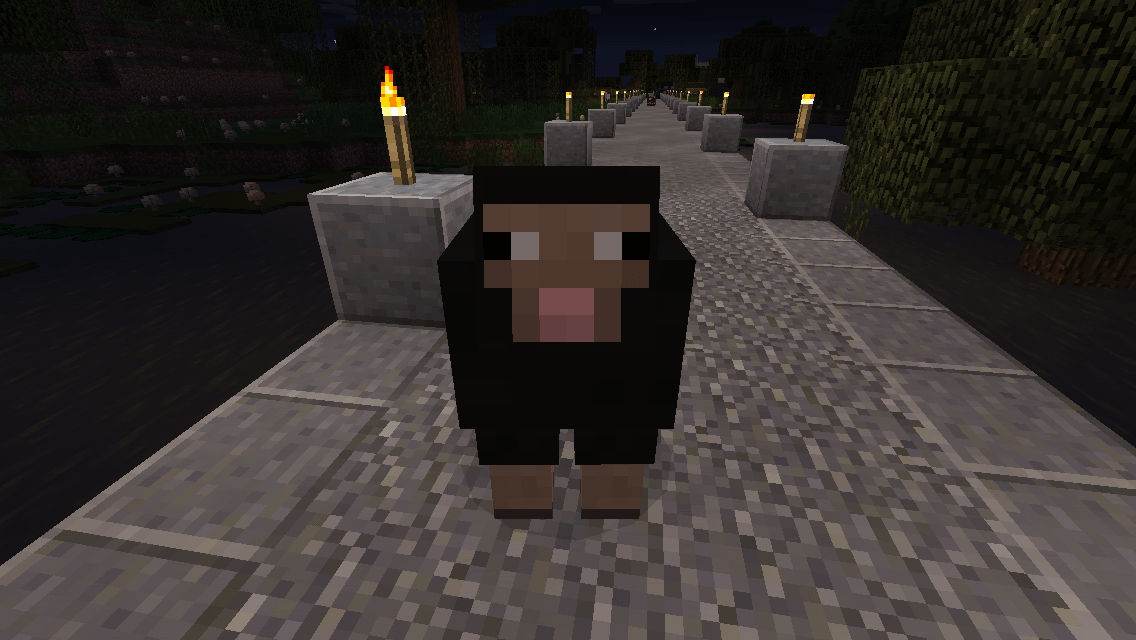
This building was my last big MCPE build in cheat-less Survival and as such it was a pain in the butt. It’s the reason why there are five nether reactor tower corpses across the samd biome (for all the glowstone and quartz) and spruce trees in an oak biome. And the poor rainbow sheep in the farm. Even with the Shear button I still accidentally punched all of them at least once getting carpet. And I still haven’t cleaned up all the supply trunks from in front either – figured their content’s’ll be useful for when I get bored and switch back into Survival. Still, oddly enough, for all the time and frustration in building it, it’s probably second only to Seuss Library in my list of favorite builds so far.
World: Main Location: -120, 71,-427) Build Mode: Survival Build completed: Early October, 2014
As part of a weekly challenge about subways on the MCPE subreddit I made a video of my subway. The video’s a little long, boring and dorky, but it does improve about halfway through when Beastie shows up and wants to know what I’m doing.
I surf a lot of brutalism galleries. I find the architecture style hideously interesting. It doesn’t help that UMass Amherst isn’t too far from me, so I’m confronted with many intensely ugly buildings on a fairly regular basis. The other fun thing about Brutalism is that examples of it are really fun to make into MCPE builds. Weirdly enough, they do not look anywhere near as ugly within the cubed off aesthetic of a Minecraft world.
My second brutalist build is based on the Geisel Library at the University of California, San Diego. It looks quite a bit like a UFO crashed on campus and then people just shrugged and filled it full of books.
This is the inspiration for this build. Yes, that is a real place!
Just for the record I’ve never been to California, let alone this campus, so I had to improvise a lot of the inside. I do think I did a pretty good job approximating the outside though. Lets take a tour!
On the Road facing North.It’s a long path from the road to the front of the library.There’s the road all the way back there.A peek at the front.Welcome to the library!
The librarians are busy tonight.
BTW it is a super pain in the ass getting villagers to stay in one spot. Hence all the glass panes on the ceiling. Good thing they compliment the info dest.
The guys at the Skull Cafe are not so busy.
Nope. They just keep jumping on the stoves back there.
Such pretty work tables! And cozy couches!
It was fun figuring out how to get “houseplants” inside without just having ugly exposed dirt blocks.
A flower shop? In a library? Sure, why not.
So lets go downstairs to the basement!
It isn’t a proper library without a creepy basement of stacks.Lots of stacks. We might be searching awhile.
These pictures aren’t really conveying what a huge basement of stacks this really is. You’re seeing a glimps eof maybe half of them.
Because my stepkids got jokes.
I really don’t know what is with them and setting random animals loose in my builds but at least the library cows are funny. Anyway…
Up to the “UFO” part of the library!Level 5 has some cozy reading areas!It’s much more inviting up here.A peek down at the road.So much for no talking in the library.
Because these guys will follow and aggressively HMMM at you.
Level 7 is the widest floor. Lots of work and read space.So this is what an all-nighter looks like.No idea how the villager got outside.
Also whoops, forgot to finish slabbing over the ceiling – you can see the wool blocks holding up the table upstairs.
Looking up to the skylight on level 10. Quite a climb!Top floor! Phew!
Level 10 isn’t part of the original library design, but a rooftop workshop felt somehow necessary.
The minions are super busy up here.Busy in the workshop…
Okay, back outside.
A daylight view from outsidea side view at sunset.Looks really cool all lit up!…this needs some sheep or wolves or something.
This took me maybe three solid weeks of work to finish up and furnish, but it’s the build I’m happiest with so far. I may go back and add more light at the base of the “UFO” at some point, as I’m afraid if I switch this to creative that dark area is going to be a ripe spawning area for hostiles. Also go back through and make sure there are no further patches of ceiling I forgot to slab over. and maybe give that poor cow a companion to roam the basement with…
So going back exactly 8 months ago to late evening, July 18, 2014. The new update to Minecraft had just dropped for iOS and I was terribly excited. Since I’ve never been a PC player (and have no real interest in starting), this was going to be my first time experiencing infinite worlds, Enderman, biomes, wolves and several other things Kidzilla and Beastie liked to tell me about during their visits.
I updated MCPE on my phone, created a new infinite world, and pushed the button…
Anticipation!
…and the image in the header appeared before me. Immediately I noticed how different everything looked from my last world. Grass everywhere. A deep river type thing stretching lazily in front of me to who even knows where. A dense copse of trees ahead, some of which looked very different from what I’d previously seen. If I squinted I could even see a mushroom off to the right. They’d been nearly nonexistent in my previous game. Best of all was looking ahead to that tree line and knowing behind it stretched a huge world waiting to be explored. (Interestingly though, I haven’t made too much of a foray westward as yet. Most of my explorations since have been to the North).
It being Survival mode though, I wanted to make a shelter before sundown. Like you do. So I made a 90 turn and started exploring the nearby landscape for a place to dig in and roost.
A good spot to start a home.
Spawn House has gotten a bit more… developed since.
Ground entrance to Spawn House.
That’s the same spot, roughly the same angle too. My, how the neighborhood has changed.
That’s not a chimney! I hope…
Lets go inside. Up the hill and around a bit:
Upper entrance.Inside!
What looks like a chimney off the left actually has a ladder going all the way up to the top of the tower. We’ll get up there in a sec.
Second floor.The Attic.
I should probably furnish up here at some point. Anyway now to go up a very long ladder…
Inside the Tower.
It got way more fun being up here once I tinkered with my options.txt file. The view from up here as a result is pretty amazing.
Northwest Roads and… stuff! We’ll visit sometime.Looking to the Northeast. Haven’t seen much that way.Southwest view. Haven’t explored much in that direction.Back ooking northeast from the tower after the sun has set.
I’ll probably have explain why there is a burnt out field of flaming netherrack covered in lava in another post. Anyway, enough ogling the scenery, lets look around in the basement(s)!
Downstairs!I guess this is the ground level?
This is the first room I carved out in the house. Because punching rocks.
Fun fact – I’ve set those dark oak stairs on fire a couple times by mistake. I didn’t know then that even if there’s a solid barrier of cobblestone containing lava, it can still set surrounding wood on fire. Oops. Actually I’ve burned down the entire spawn house at least once during construction that way, which is why that chimney isn’t actually a chimney.
Basement with bed.Lava!
Got a lava pit you don’t know what to do with? build a window and make it part of the decor!
Wait there’s more down?Sub-basement 1.
I don’t even know what the kids did down here, the level is kinda trashed, hence the sign apologizing for the mess. I think they were trying to set up super secure beds or something.
Sub-Basement 2.
If I’m mining out a space under a house in Survival I tend to leave behind these cobblestone warrens of platforms and stairs.
Bottom floor.
Despite many warnings not to do so, this was the point where I got tired of carefully mining out levels and just went on ore hunts by mining down in checkerboard patterns. I only died a few times…
Subway Entrance
You can just see the platform through the doorway, but we’ll go out there another day.
So there you are, my first house in this world. Go big and go home, right?
World: Main Location: spawn point (272 65 11) and Spawn House (220 69 6) Mode: Survival Build completed: ~July 2014